Connecting
Rampify hosts a remote MCP server. No packages to install, no API keys to manage: connect via OAuth, pick your project, and start querying. New tools appear instantly without version updates.
What is MCP?#
The Model Context Protocol (MCP) is an open standard that lets AI assistants connect to external tools and data sources. When you connect Rampify via MCP, your AI can check SEO status, generate meta tags, analyze search performance, all from natural language prompts in your editor. See all available tools.
Prerequisites#
- A Rampify account with at least one project
Coding tools#
Pick your tool below to connect Rampify in one click (Cursor, VS Code) or copy a ready-to-paste command (Claude Code, Claude Desktop). Each picks up your account's OAuth on first connect.
You'll see this same picker inside the app on every project page, where the "Then run this" prompts adapt to whatever page you're on.
↓ Try it: fully interactive, same picker as in the app.
claude mcp add --transport http Rampify https://www.rampify.dev/api/mcpList my projects in RampifyConfirms the connection and shows which project is active
Crawl my websiteFull-site scan — discovers URLs, records metadata, files spec for any issues found
Suggest keyword clusters for my siteGroups keywords into content briefs grounded in your business profile
Claude UI#
Using Claude on the web (claude.ai) or Claude Desktop? Add Rampify as a connector through the UI.
In Claude, go to Customize → Connectors, click the + icon and choose Add custom connector.
Name it Rampify and enter https://www.rampify.dev/api/mcp as the URL.
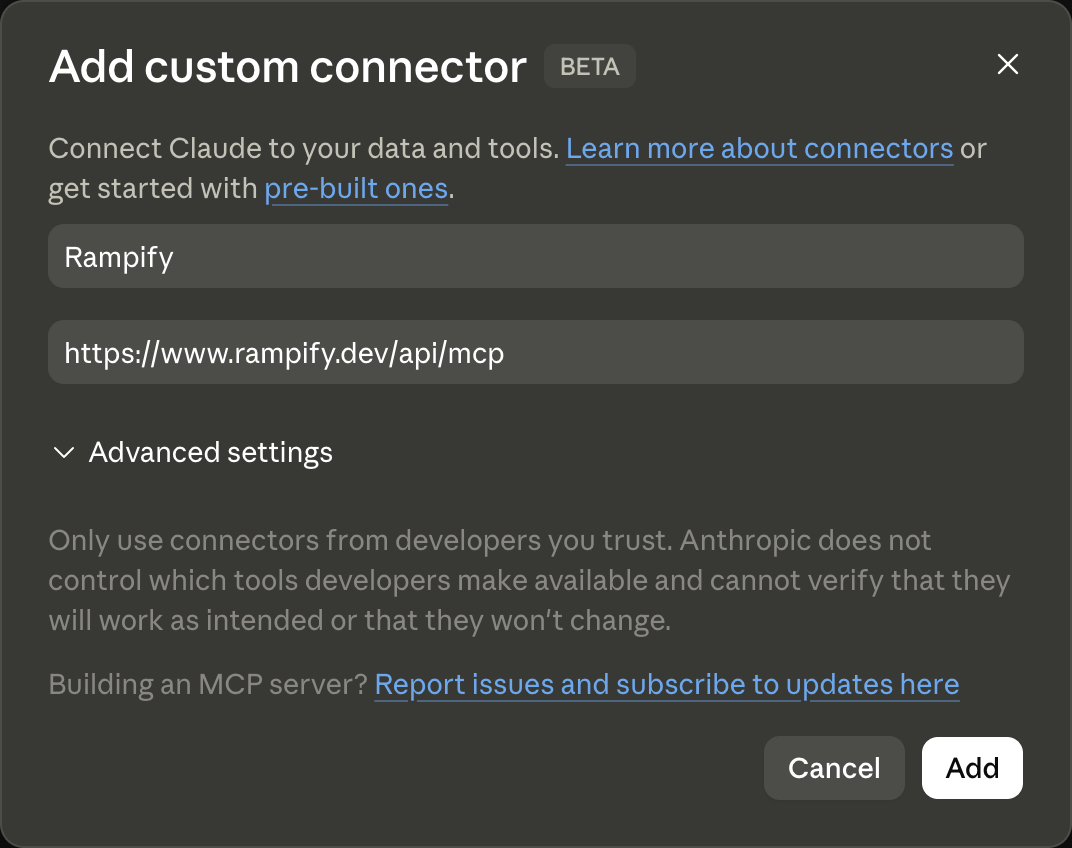
Click Add, then the Connect button that appears, and sign in to Rampify when prompted.
Multiple projects#
When you connect via OAuth, you select which project to use. The connection is scoped to that project, so tools only operate on the data you chose.
To switch projects, re-authenticate your MCP connection. The project picker will appear again and you can select a different project.
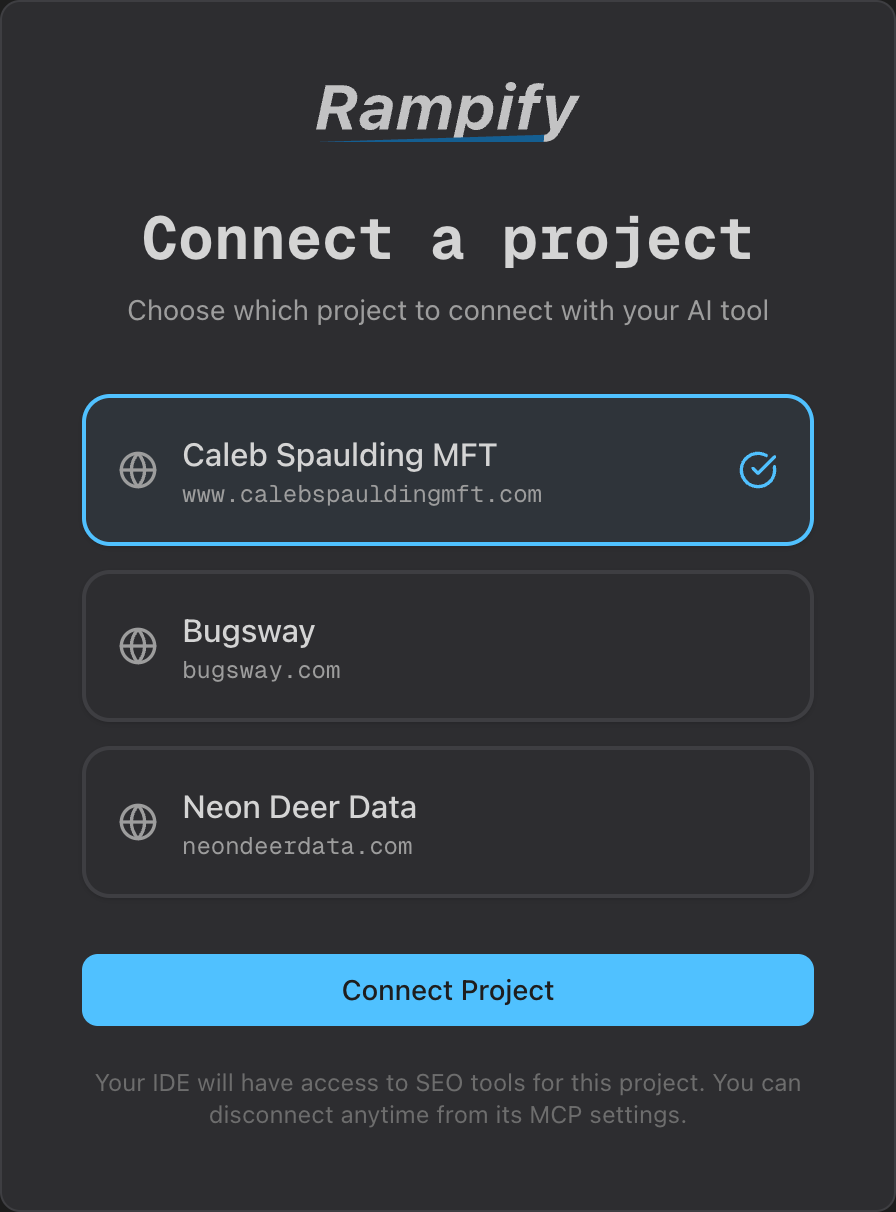
You can also check which project is currently active:
Running agents in parallel across worktrees (Conductor, Cursor, Emdash)? See Agent Orchestration for project-scoped keys and the .worktreeinclude pattern that connects every workspace at once.
FAQ#
Do I need an API key to connect Rampify?#
No. The Rampify MCP server uses OAuth. You connect, pick your project, and start querying. There are no API keys to create or manage.
Which AI tools can connect to the Rampify MCP server?#
Any MCP-compatible client: Claude Code, Cursor, VS Code, Windsurf, Zed, Claude Desktop, and claude.ai.
Do I need to install anything?#
No. Rampify hosts a remote MCP server, so there is nothing to install and new tools appear automatically with no version updates.
How do I switch which project Rampify uses?#
Re-authenticate your MCP connection. The project picker appears again during sign-in and you can select a different project.
Getting help#
Stuck on a connection step, or a tool not behaving the way this page says it should? Email support@rampify.dev and we'll get you unblocked.
Already connected? The send_feedback tool sends notes to the Rampify team straight from your AI tool, no email required.